2019 16″ Macbook Pro Review: Apple Finally Listens

Like most other Apple users, I’ve begrudgingly put up with Apple’s bullshit of the last four years or so. I’m talking about the horrendous butterfly keyboard, MacBook “Pros” plagued by overheating and throttling, poor component options, and god-awful anti-repair anti-upgrade design. I worked at a repair shop and had to tell a customer that his single broken key (spacebar) would require a $700 repair, due to the butterfly keyboard design, part of the entire palmrest, battery glued to it, and so on. Many, many people have expressed their dislike of Apple’s choices, especially the keyboard, but Apple doubled down, insisting that it was “revolutionary” and that any malfunctions were an edge case. You know how Apple is, and I suspect that the design process for each new MacBook is actually many years long and that it simply takes a lot of time to correct course. Whatever the reason may be, Apple insisted on pumping out shitty products for several years, until the end of 2019 when they sneakily released the 16″ MBP.

I’m not kidding about the “sneakily” part! They simply published it on their website with zero fanfare, a very un-Apple move. I think we all know the reason for this: They didn’t want to draw attention to the fact that they were apologizing for past mistakes. But make no mistake (hurr), the 16″ MBP is exactly that, an apology, and one I have happily accepted. Butterfly keyboard is out (thank Sigmar), scissor-switch-powered “Magic Keyboard” is in! Component options are plentiful and powerful! Throttling and overheating is (mostly) a thing of the past! Repairability is… well, that’s still shit, but I’ll take what I can get.

My Machine

I went all-out when purchasing my 16″ MBP, for two reasons. The first is that I am a straight up addict, and once I go down the rabbit hole of configuring hardware… expensive things happen. The second reason is that I found a fully decked out MBP on Craigslist, still new in the box, for about $600 less than the asking price would have been if I bought it from Apple. I like those savings, and I also like purchasing secondhand and depriving Apple of my money! The specs:

  • 2.4GHz 8-Core i9
  • 32 GB DDR4 RAM
  • 2TB SSD
  • Radeon Pro 5500M 8B

It is an absolute beast, not even breaking a sweat under heavy workloads. I figure the maxed-out specs are worth it since I can’t ever upgrade this thing, and I got the extended AppleCare for three years of coverage in case anything does go kaput.

The Bad

I’m starting with “The Bad” because the list is surprisingly short. All things considered, the complete inability to repair or upgrade this new MacBook Pro is really the only gripe I have with it. It’s a big gripe; I worked in a repair shop for many years, and I have watched the design of Apple’s hardware become increasingly difficult to repair. Intentionally difficult to repair. Apple is intentionally designing their machines so that you can’t repair it, you can’t upgrade it, you can’t do anything but use it the Way Apple Intended, and then buy a new one when it breaks down. Apple does still build excellent quality products that will last a long time, but everything breaks eventually. There are still people out there using their 2008 MacBooks because whenever a component fails they take it in to a repair shop, $120 or so in repair fees and new parts, and they’re back in action! Apple doesn’t get any of that $ though, but they’re also smart. Instead of trying to fight “right to repair” laws and force people to use Apple for repairs, they’re just building products that are more difficult to repair.

How difficult to repair? Borderline impossible! IFixIt gave this machine a score of 1 for repairability (out of 10). Essentially all components are soldered directly onto the main system board, so if your SSD or RAM dies… bummer dude, that repair is going to be prohibitively expensive and only Apple will be able to do it. Even if everything is fine and you just wanted to upgrade… can’t do that either. What if your MBP is a couple years old and you need a new battery? After all, all Lithium-Ion batteries degrade with time, there is nothing you can do to prevent this, and you’ll need a new one at some point. Unfortunately, Apple has seen fit to separate out the battery into six different “lobes” and literally glue them to the palmrest assembly with insanely high-strength adhesive. At my repair shop we could remove them with hours of frustrating work and strong solvents, risking battery chemical leakage. Replacement batteries were also expensive, so a battery replacement on a newer MBP will easily run $300-400. So yeah, I think Apple’s design choices for a guaranteed-to-fail component are pretty goddamn stupid.

Oh, you can repair/replace the trackpad fairly easily. At least that’s something?

Size and Weight

I know, I said I only had one major gripe… but I can find some smaller things to nitpick if I really try. This is a big, heavy laptop, tipping the scales at 4.4 pounds. The screen is larger at 16″, although Apple reduced the bezels by a significant amount so the overall footprint isn’t much larger than the previous 15″ version. Still, it’s pretty hefty to lug around.

To be honest, I don’t really have a problem with this. This is meant to be my workstation; I want it to be POWERFUL, and I want a big screen so I can see more at once. That necessitates a large machine, and I don’t mind lugging it around. For me it’s more than an acceptable tradeoff for the working power. If I need something lightweight and won’t be doing heavy work I’ll take my iPad Pro.

Ports (or Lack Thereof)

We’ve still only got four USB-C Thunderbolt ports to work with here. While this is still irksome, I’ve accepted the dongle life, and once you have a good dongle hub it really is fine. Sure, having to drag out the dongle just to plug in a flash drive is annoying, but you get used to it. At least the ports are insanely powerful in terms of the range and amount of devices you can plug into them!

The Good

Anyways, repairability aside… I actually love everything about the 2019 16″ MacBook Pro. Some things aren’t new, like the fantastic Apple ecosystem; if you haven’t experienced the seamlessness that happens when all your gadgets and services are Apple, you’re missing out. Sure, you can use Messages for Web to see your Android phone messages in your browser, or you can use Duet or something similar to configure your tablet as a second screen, or you can install apps that let you transfer files to your PC from your phone over WiFi… but those take time to set up and configure, can be frustrating to get working, and often cost extra money. With Apple, the stuff just works. Airdrop is fast and easy to use. iCloud keeps everything in sync, very quickly, and in an intuitive way that doesn’t need any configuring for most people. iMessage is incredible as a messaging platform – did you know it has built-in screen share?! Sidecar (using an iPad Pro as a second screen) is built-in and just works out of the box. Continuity makes switching between devices, signing documents, and many more things super easy.

The trackpad is also incredible, but that’s nothing new; Apple figured out how to win the Trackpad Game years ago, and they have been absolutely destroying other laptop makers ever since. I don’t know what the hell these other companies are doing, but no other trackpad that I have used has come even close. I’ve used a huge number of trackpads too, when you factor in all of my years in repair shops and IT support roles. Apple’s trackpads are big, smooth, responsive, gestures are intuitive and powerful, clicking just feels great. Now that the keyboard kerfuffle is behind us, I never bother using a proper mouse and keyboard, not even when working at my regular desk. The 16″ Macbook Pro trackpad and keyboard are just that good.
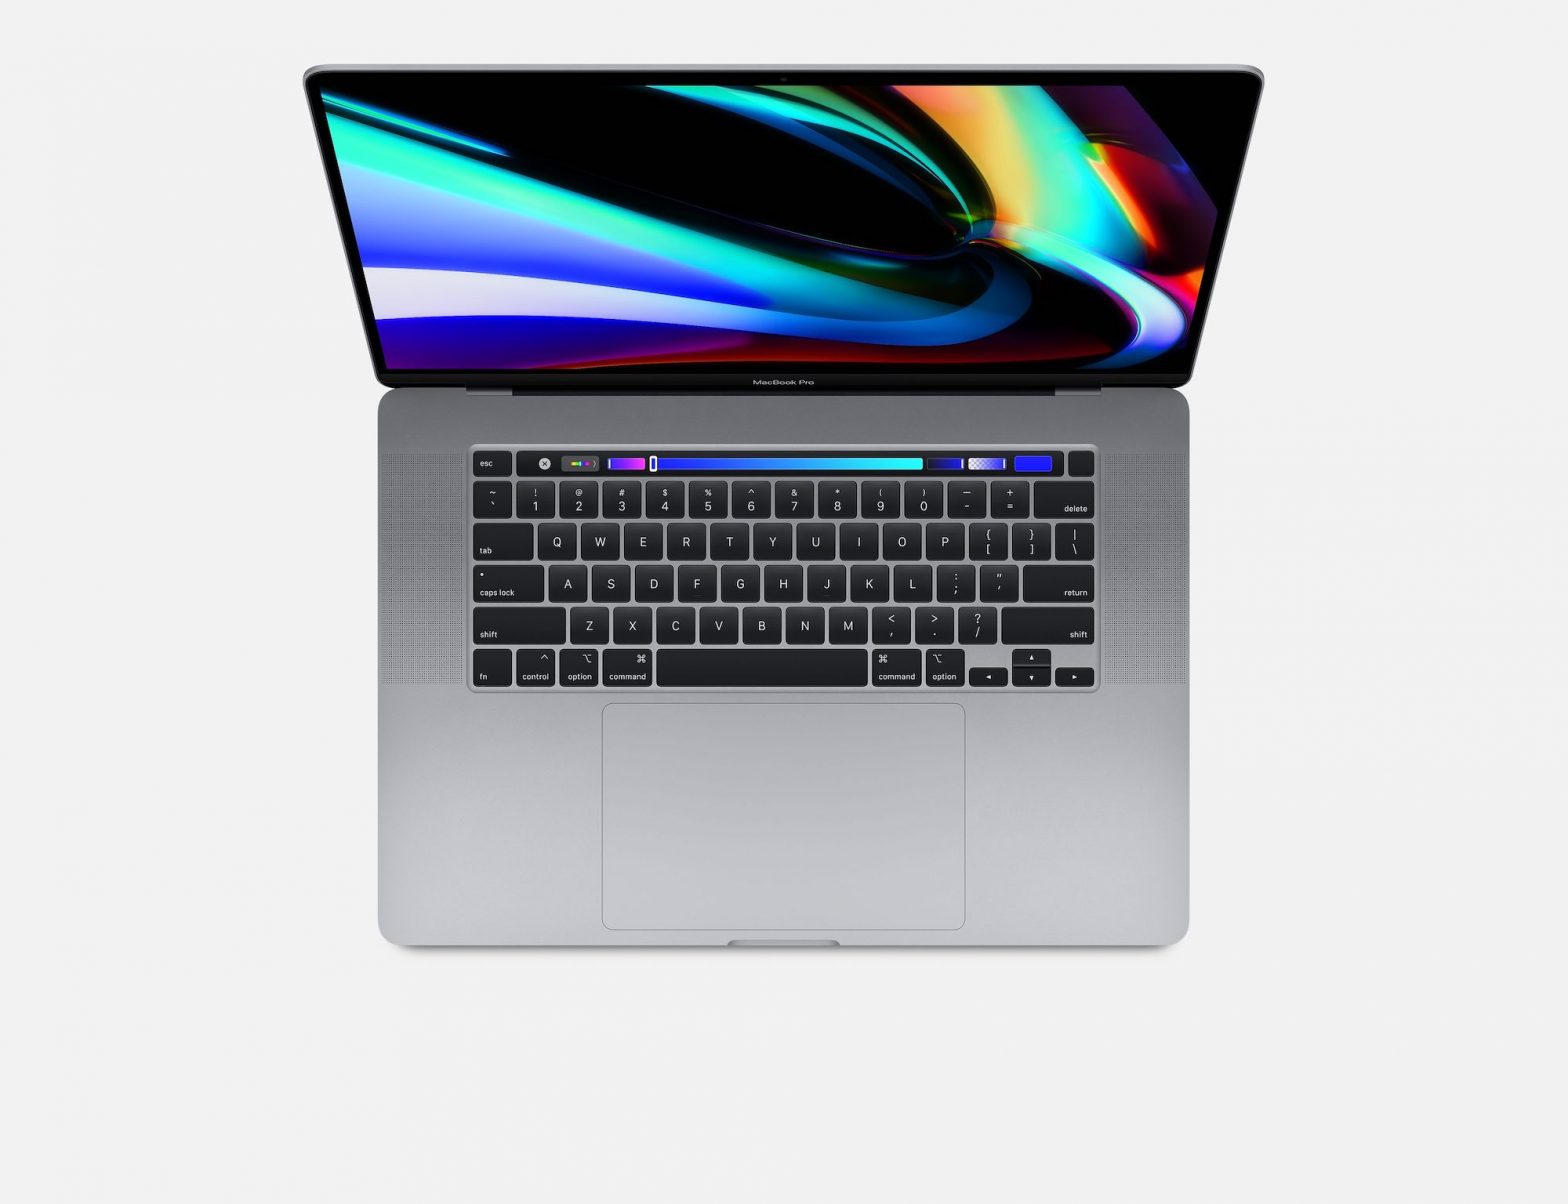
The Keyboard

The keyboard here is the most obvious change from previous years, as Apple has abandoned their precious butterfly mechanism and switched back to scissor switches for the “Magic Keyboard”. You may recognize that name from Apple’s standalone bluetooth keyboard, and yes, this is basically the exact same keyboard, except on a laptop. I’ve always liked Apple’s keyboards, and I like the one on this MBP too. The keys feel like they have more resistance than on the standalone version – a plus for me, someone who has always preferred mechanical keyboards. The keyboard is large and Apple brought back the physical Escape key (hallelujah) and also made the Touch ID into a physical button that doubles as the power button. They’re still insisting on using the Touch Bar, and I’m still insisting on being pretty *meh* about it. It works, it’s cool looking, you can do some pretty nifty stuff with it… but it’s still solving a problem that didn’t exist, and it’s also annoying at times as it’s easy to hit the wrong thing without having the physical feedback of real buttons. Whatever, it works fine, and the physical escape key takes care of most of my frustrations with it. I will say that it does crap out occasionally and become unresponsive, which is only fixable by rebooting… or killing the associated process, which I can never remember the name of and always have too Google, and I should really bookmark that. Or Apple could get their shit together and fix it.

Performance

Apple stepped up their game with cooling and it shows, with the new-and-improved MBP being able to handle much heavier workloads before triggering any throttling. It’s important to note here that virtually all laptops throttle; it’s simply the reality of the form factor. Previous MBPs were exceptionally bad about it, throttling early and so much that performance was just plain bad, especially for a machine supposedly designed for professionals. The new 16″ MBP has better cooling and bigger vents, and the fans do get up to an audible volume when under heavy loads, but certainly not too loud in my opinion. It does get pretty toasty and I don’t recommend working with it directly on your lap. That’s bad for your posture anyways, for goodness sake, get a good laptop stand!

My machine has handled everything I have thrown at it without breaking a sweat. Sometimes this has been video editing, although it’s only 1080p which isn’t all that intensive. Exporting a 30-40 minute video from iMovie takes 3-4 minutes. For comparison, my 2017 MacBook (not a pro) would take around 45 minutes for the same task. When I’m programming, I’m usually pushing two additional displays (one monitor and my iPad Pro with Sidecar), dozens of browser tabs open in Chrome and Safari, several instances of VSCode, countless terminal sessions, all my communication stuff (Mail, Discord, Slack, Messages), and of course streaming music from Google Play. No matter how much I have open it doesn’t seem to make a difference, and I have yet to see this beast slow down or chug even a little bit.

Battery Life

It’s excellent. Apple crammed as much battery as they could into this thing, putting it just shy of the 100 watt-hour limit for airline travel. I believe they advertise 10-hour battery life, and for lighter use (web browsing in Safari, documents, notes, etc) that is easily achievable. Safari really is infinitely more power efficient than Chrome, by the way, so use Safari if you need to stretch your battery life. When I’m working on heavier development tasks and pushing my iPad Pro as a second screen (which also charges the iPad) I can get 3-4 hours out of it. Heavy work with no additional screen is typically in the 5-6 hour range. I also carry a portable battery pack with me, typically this is for charging mobile devices, but thanks to the MBP’s ability to charge over USB-C I’ll use this pack to extend my battery life even further. It’s the best battery life I’ve seen in any laptop yet.

Audio Stuff

The microphone array and speakers are another area where Apple really hit it out of the park. I don’t do professional audio work so I can’t comment on whether the mics are really “studio quality”, but I can tell you that I answered a phone call on my Mac (hat tip to the great Apple ecosystem) while in a noisy cafe, and talked on the phone with my best friend for about 30 minutes without using a headset of any kind. He said that he could hear a little bit of background noise while I was speaking, and none at all when I wasn’t speaking. That’s pretty damn impressive to me! I could hear him easily too, because these speakers are LOUD. Like filling a large room, sounds like a full-blown stereo system loud. Not only that, but the sound quality is incredible; crisp, clear, full, all those sound-describing adjectives. When working at home I’ll often just play music straight from my Mac instead of grabbing my headphones – my Bose headphones, mind you!

Screen

I don’t have a lot to say here; If you’ve used a MacBook Retina display before, you know what you’re getting here. The resolution is higher and the screen is bigger at 16″, and with the “more space” setting enabled it really is fantastic – I can put two editor windows side-by-side in VSCode and still have plenty of room to spare. It’s big enough that working on only my MBP screen with my 10.5″ iPad Pro as a second screen is more than enough for high levels of productivity.

Closing Thoughts

The Pros heavily outweigh the Cons and I’m very happy with my 16″ MacBook Pro. I’m writing this review after over three months of heavy use, and so far, so good! I’m confident in saying that Apple would have to release some serious game-changing updates to the MacBook Pro line to entice me to consider upgrading anytime soon.

GPD Pocket 2 Review – Unboxing and First Impressions

If you’re like me, you’ve always thought it would be super cool to have a tiny, pocket-sized laptop that was every bit as capable as a full-sized laptop. It’s just such a cool concept, having a tiny computer that’s as adorable as it is ultra-portable. This isn’t a new thing. Tiny laptops have been around for many years, the problem is that most of them suck. They are limited by either OS (Android, ChromeOS, etc) or by hardware and can’t be used reliably for much more than web browsing and watching videos. We already have pocket computers that do that just fine in the form of smartphones. Add to that cramped keyboards, lack of ports, and reliability problems… As I said, they just haven’t been great. There is an obvious market for these miniature computers, and several companies have been working to take advantage of it in recent years. The GPD Pocket 2 is the first model to pique my interest, which is why I decided to purchase and review it. It checks all the boxes for what I want in a tiny laptop:

  • It fits in my pocket. I probably won’t actually carry it around in my pocket most of the time, but you know, if I want to, I can!
  • Powerful hardware. I’m seriously impressed by the hardware in this device.
  • Designed to be used while held (as opposed to only on a table or desk).

Without further adieu, let’s dive in!

Unboxing and Setup

My Pocket 2 is the 2019 update, which features this hardware:

  • Intel Celeron Processor 3965Y 2 Cores@1.5GHz
  • 8GB LPDDR3 RAM
  • 128GB of flash memorystorage
  • 7″ screen @ 1920 * 1200
  • 2×3400mAh batteries
  • 2 USB-A ports, one USB-C port (for charging)

The box had an interesting texture, it felt almost like felt, pun intended. Unfortunately, mine looks to have had something spilled or smeared on it, which sort of ruined the aesthetic… but hey, stuff happens, and it’s something that wouldn’t hurt the device inside. The box was sturdy and everything inside was well packed with a protective sleeve around the computer and a protective slip between the keyboard and screen. I was immediately impressed by the weight of the Pocket 2 – it feels expensive. Sturdy construction and quality parts lend a definite heft. The device was in perfect condition, and I spent several minutes turning it about and admiring it.

Included in the box was the charger and a brief user’s manual, detailing how to turn the computer on and push buttons and the like. I plugged it in and pressed the power button and it fired right up to the Windows 10 setup screen. Setup was quick and painless and I was impressed with how quickly Windows 10 loaded on the first startup, as well as how quickly it responded to my clicking about and opening a few random applications.

Since my purpose for the Pocket 2 is to be my “web dev on the go” device, I immediately showed Windows 10 the door and installed Linux. After research I decided to go with Ubuntu Mate, because they have a distro specifically built for the Pocket 2 that has excellent compatibility out of the box and utilizes the Pocket 2’s unique hardware. Setting up Mate was a breeze, and it did indeed work flawlessly right out of the box. I’ve spent about 8 hours futzing around with Mate settings, installing Chrome and Visual Studio Code, and working on learning the keyboard layout, and I haven’t ran into a single Mate problem yet.

First Impressions

Overall first impressions are that the Pocket 2 is awesome, definitely worth the money, and I’m excited to continue using it. It has a solid, premium feel, it’s fast, and the battery life is excellent. The optical trackpad and mouse button layout is genius and works very well. The keyboard is good enough, nothing special, but it’s rare for a full-sized laptop to have a great keyboard so I’d say that doesn’t matter. The keyboard layout is going to take some serious getting used to.

Build Quality

The Pocket 2 is heavy and sturdy. It feels like it could handle drops and bumps and keep on ticking, although I hope to never put that to the test! The keys and buttons all work well and have good resistance. The hardware control keys (sound, brightness, etc) actually felt a bit too stiff and difficult to push at first, but after using them for a while they loosened up and now they feel great. The display is mounted well and doesn’t fall open or closed if you’re holding it at a weird angle, which is great for those of us who want to compute in bed. The screen is of average brightness and sharp, really sharp, it’s really impressive that they packed such a high resolution into such a tiny screen. Side note on that: Ubuntu Mate has built-in resolution scaling to make everything easier to read. If you like reading text sized for ants this is easy to disable in settings.

Performance

I haven’t put the Pocket 2 through any real tests yet, but it’s handled everything so far (lots of messing with configuration, installing software, web browsing) without breaking a sweat. I’ve noticed no visible slowness with opening and using applications, and my taskbar system monitor shows resource load is always low. I’ll be doing a follow-up review in a month or so after using this for development work, so stay tuned for that review to see how the performance holds up to real-world use.

Battery Life

Battery life is great! I did some tests with YouTube videos at various brightness, and it looks like the Pocket 2 can provide about 6 hours of battery life for moderate use at 1/2 brightness. The screen is still plenty easy to see at low brightness (provided you are indoors), so that would likely extend the battery a good chunk further.

Trackpad

The optical trackpad works surprisingly well and feels like a hybrid of the standard trackpad and the “eraser head” trackpad immortalized by the IBM Thinkpad. You just slide your finger around on it and the mouse moves, with good speed and it’s easy to pinpoint what you want to click on. It does take some getting used to, but I felt comfortable with it after about an hour. Honestly, it felt easier to use than a lot of non-Apple laptop touchpads out there. The trackpad can be clicked down for left-clicking on things or even dragging them around. The top-left of the device has two buttons for left and right mouse clicking, which makes it simple to use the device in “two-handed mode”, holding with both hands and operating the mouse with your thumbs. A nice feature added by Ubuntu Mate: you can hold down the right mouse button and then use the trackpad as a scroll wheel!

Keyboard

The keyboard is what I would consider “perfectly acceptable” in terms of how the keys feel for typing. It’s not great, it’s not terrible, it’s just average. I’m not particularly picky about my keyboards, mostly because if it isn’t a mechanical keyboard then I’m not going to be happy with it; I just want it to function well, and if I’m doing some extended typing I can dock to my mechanical keyboard.

The only major downside of this keyboard is that the layout is not standard. this is understandable; You can’t pack a full keyboard into a 7″ laptop without having all the keys be tiny bordering on unusable, so GPD did some creative rearranging to make everything fit. All the letter and number keys are in their usual spots, so typing basics feel great. The punctuation and special keys are moved all over the place, however, and there is no right shift key. Fortunately, it turns out that I tend to favor the left shift key for most letters, so that won’t be too much of a learning curve… but the rest of the re-arranged keys will be a challenge. This is something I’ve done before when I used a Portuguese laptop for over a year. If you haven’t used one of those, the Portuguese keyboard has a similar layout to a US keyboard with some different characters and with some keys, particularly punctuation keys, in different places. I was able to adapt to that after a couple of weeks of use so I don’t foresee a problem with the Pocket 2’s keyboard.

Usability – Size

The greatest feature of this computer – the tiny size – can also be its greatest drawback. It’s tiny! The small screen size means you need to be reasonably close to easily read text, and the keyboard is cramped even for someone who memorizes the new layout. I’m also tall at 6’3″ and concerned about potential back pain problems from having to lean or hunch over more than usual due to how much lower down the screen is. On my MacBook I use a nifty stand that angles the keyboard at about 45 degrees and elevates the screen so I can sit up straight and look almost straight ahead at the screen, and it has worked wonders for my posture and allowing me to work longer periods without back or neck pain. The Pocket 2 is way too tiny for this stand, that’s for sure! I may be able to find a stand for it, but the goal here is to be ultra-portable and not carry around a lot of junk with me.

If I’m being realistic, it’s hard to see a use case for the Pocket 2 as a heavy-duty, long work session machine. I have no doubt that it could handle it, but I’m not sure that I could handle it from an ergonomics standpoint. I’ll certainly give it a chance, so stay tuned for an in-depth follow-up review in 1-3 months after I’ve had time to really put the Pocket 2 through the paces.

Thanks for taking the time to read my GPD Pocket 2 Review, and be sure to check out my other tech reviews here!

How to Stage your WordPress Site Locally (MacOS)

So you created a WordPress site and unleashed it on the world, and now you want to start making some changes. There are a lot of things you can do using the admin dashboard, but eventually, you’ll probably want to make changes that involve changing or adding actual files and code. While there are ways you can make these kinds of changes on a live site, this is ill-advised for obvious reasons. Fortunately, you can set up your WordPress site locally on your computer, using it to test new ideas and make sure they work properly before deploying them. This guide was created with MacOS Mojave 10.14.5 beta, but should still apply for most older MacOS versions. I’ll be writing another guide for Linux in the near future.

Requirements

You’ll need these things in order to get your local WordPress site up and running. I’m not going to go into detail on how to set them up, but feel free to follow the links for install guides as needed.

Homebrew. Billed as “the missing package manager for MacOS”, it is a must-have if you develop on MacOS. Get it here.

PHP/Nginx. MacOS ships with PHP, with version 7.1 currently being bundled with Mojave. I recommend using the latest version (7.3 at the time of writing). You’ll also need Nginx coupled with the php-fpm extension for serving content. Fortunately all of this can be installed with Homebrew; refer to this guide for instructions.

MySQL. You’ll need this for your WordPress database. Use Homebrew for this as well, as per this guide. For the purposes of this guide, you won’t need any previous MySQL experience, but if you don’t have any and want to learn then this is a good introduction.

Valet. In simple terms, Valet is what lets you easily access your local site in your web browser, and makes it behave just like it does on the live site. It’s a powerful tool and can do all sorts of cool things! You’ll need Composer (get it here) first, and then you can set up Valet by following the instructions here.

WP-CLI. The WordPress command-line-interface is both useful and powerful, allowing you to tweak all sorts of things on your site straight from the terminal. It can be especially handy if your test site is completely borked up, allowing you to do things like deactivating problematic plugins. Get it here.

Terminal. You can certainly use MacOS’ built-in terminal, but I recommend going with a more robust alternative like iTerm2.

Get the Site Directory Files

First things first, you need to decide on a local directory where you will keep the files for your website. This can be anywhere, but your future self will thank you if you decide on some sort of organization. Make a new directory, and name it so that it matches your website domain minus the TLD (for example, “twirltech.solutions” becomes just “twirltech”.

Next, you need to copy the files for your website into this new directory. There are lots of ways to do this, including:

  • Rsync. Fast, powerful, and easy to use, rsync transfers data over SSH (many other functions). You’ll need to install rsync if you don’t have it yet, using (you guessed it) Homebrew as per this guide. Since this will require SSH, you’ll also need an SSH key. You’ll need to allow this SSH key on the server hosting your website, and if you have no idea how to do that you’ll need to talk to your hosting provider or administrator. If you get all this set up, you’ll run something like this command from your local website directory:
rsync -avz -e 'ssh -p <port number>' <remote username>@<remote server>:<path to site directory> .
  • FTP. While generally considered slow and insecure, FTP is still a viable option if your hosting provider doesn’t allow you SSH access. For instructions on how to connect via FTP you’ll need to contact your hosting provider. I recommend installing and using FileZilla using the credentials from your provider.

If you did everything correct, then your local site directory should contain all the files for your site’s WordPress install (so you should see wp-config.php, the wp-content directory, etc).

Getting the Database

You’ll need a dump of your website’s live database. As with the files, there are a lot of ways to get this file. I recommend making a separate local directory and using it to house all your database dump files.

  • From your hosting provider. Many hosting providers will have tools for downloading a database backup.
  • From phpMyAdmin. If your hosting provider gives you access to CPanel, you should be able to launch phpMyAdmin from the main CPanel interface. Then, select your site’s database in the left-hand column, click on the Export tab, and click Go – this will download the database dump as a .sql file in your browser. (Note: This works great for smaller databases, but can be unreliable with very large websites).
  • SSH + Rsync. Again, lots of ways to do this, and if you know how you probably won’t be reading this guide. In a nutshell, you’ll first connect to your web server with SSH, then export the database (using either mysqldump or wp db export), then use Rsync from your local machine to copy the file down.

Setting up the Database

Now that you’ve gotten your hands on your database file, it’s time to set that up in MySQL. (At this point, you should have already created a database user. Since this is a local setup, you can safely use just one database user for all of your locally staged sites). You’ll need to run some MySQL commands to set up the database. Important: the semicolons are a part of the commands.

Start the MySQL command line interface:

mysql -u <username> -p

Create a new database for your site, naming it whatever you want.

create database <name>;

Select the database you just created.

use <name>;

Import the database file that you downloaded in the previous section. Replace <path> with the full path to the database file.

source <path>

We’re done here, so just type exit to get out of the MySQL interface.

Next, in your terminal, cd to the directory where your site’s files are (this is the directory that contains wp-config.php). First, open wp-config.php and update it with the database user, database name, and database password for your setup. Save and close the file. Now you have a few terminal commands to run from this directory.

Update your local database to use the new .test TLD that Valet will create. replace your-site with whatever your site domain is. Of course, if your site doesn’t use a .com ending, then replace .com with whatever your TLD is.

wp search-replace your-site.com your-site.test

Tell Valet where your site files are located, and what the site domain is. Do not include .com, .test, or any sort of ending.

valet link your-site

Secure your local site so that it will load over HTTPS.

valet secure your-site

Did it Work?

Fire up your web browser and navigate to your-site.test. Hopefully, your website loads, looking the same as it does live!

Greetings, World!

First post, thanks for reading, and all that jazz!

I am building my website using the 2019 starter theme provided by WordPress, along with the new Gutenberg editor. I made this decision for two reasons, the first being that I have never actually used a built-in WordPress theme, much less used the new Gutenberg editor. As a developer, I have built and contributed to a good many themes, but since none of my clients used a WordPress starter theme, neither have I. I haven’t used Gutenberg for reasons that will be obvious to any WordPress developer or site administrator; Gutenberg, the new “block editor” that ships with WordPress starting in version 5.0, has a reputation for being buggy, difficult to use, and being “a solution to a non-existent problem.” In fact, my first encounter with Gutenberg was when I upgraded a client site to WordPress 5.0 and the site frontend was broken in several areas. Fortunately, I was able to install the Classic Editor plugin (disabling Gutenberg) and everything returned to normal. If all it takes to break things is the presence of the Gutenberg editor, then (in my opinion) it should not be used even if it does bring some cool new features to the table. However, the WordPress team has made it clear that Gutenberg is here to stay, despite the tremendous outrage from the WordPress user and developer communities. It is entirely possible that Gutenberg works great once you know how to use it – after all, this statement is true for just about any third-party theme, or even the Classic editor. Even if Gutenberg really is just bad, I will benefit more from learning how to use it and being able to clearly articulate why (or why not) it should be used.

My second reason for choosing 2019/Gutenberg is time, or rather the lack thereof. In addition to being a freelance developer, I also have a full-time job, a spouse, and two pets to keep me busy – and attempting to maintain some semblance of social life takes care of any remaining free time! Originally, I planned to go all-out on my own website: everything would be custom, custom theme, custom plugins, super cool layout, revolutionary features, something that would accurately showcase my talents! Of course, these things take time and lots of it. As the months rolled by and my website remained undeveloped, I eventually realized that I simply don’t have the time to go crazy with over-developing my own website. On top of that, why should I? I already have plenty of other sites and applications that showcase my work.

This got me thinking further: What purpose does my website serve?

  • To showcase my work. This can be accomplished with a “Portfolio” page.
  • To tell people about myself. This can be accomplished with an “About Me” page, and perhaps also a “Resume” page.
  • To host my blog. I journal frequently, sometimes in a physical journal and sometimes using a Google Drive folder. Sometimes I write about personal things and I won’t be posting those here. Sometimes I write about work experiences, new things that I am learning, stuff I’ve built or fixed, or just thoughts about the world. I’d like to be able to share some of those with the world at large, especially if they may be useful to someone else who is facing similar challenges.

And there you have it! Keeping these purposes in mind, I shall build my site with Gutenberg, themed with 2019, and chronicle my adventures in the blog. Thanks for reading, and of course comment anytime if you want to share your thoughts!